The official explanation of the WPS add-in:
WPS Add-in is a set of web-based solutions for extending WPS applications. Each WPS add-in opens a corresponding web page, and completes its functional logic by calling the JavaScript method in the web page. The web pages opened by the WPS add-in can directly interact with the WPS application. At the same time, multiple web pages in a WPS add-in form a whole and can share data with each other. Developers don’t have to pay attention to browser compatibility issues, because the bottom layer of the WPS add-on is an optimized extension based on the Chromium open source browser project. The WPS add-in has the characteristics of rapid development, light weight, and cross-platform, and has been adapted for Windows/Linux operating systems. WPS add-in features are as follows:
- full functionality. Documents, spreadsheets, and presentations can be authored, formatted, and manipulated in many different ways; almost anything you can do with a mouse or keyboard can be done with a WPS add-in; repetitive tasks can be easily performed and automated.
- Three ways to interact. The custom functional area adopts the open CustomUI standard to quickly organize all functions; the task pane, which displays web pages, has richer content; the web dialog box, combined with event monitoring, realizes free interaction.
- Standardized integration. It does not affect the JavaScript language features, and the running effect of the web page is exactly the same as that in the browser; the development documentation of the WPS add-in is complete, and the interface design conforms to the JavaScript syntax specification, avoiding unnecessary learning costs and shortening the development cycle.
If you want to really know what this so-called “add-in” is, it is better to practice it on paper, and follow the steps below. First of all, you need to install wps (nonsense) and Node.js on the computer.
1. Administrator privileges(If you install wps personal version, you don’t need administrator privileges)Start the command line and install the wpsjs development kit globally via npm: npm install -g wpsjs if it has been installed before, you can update it:npm update -g wpsjs .
It is recommended to use Taobao mirror: npm config set registry https://registry.npm.taobao.org
2. Create a new wps add-in, assuming the name is “HelloWps”: wpsjs create HelloWpsseveral options will appear as shown below:
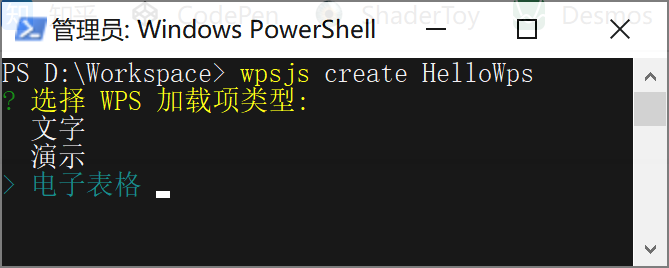
3. Here we choose “Spreadsheets“, will let you choose the front-end framework:
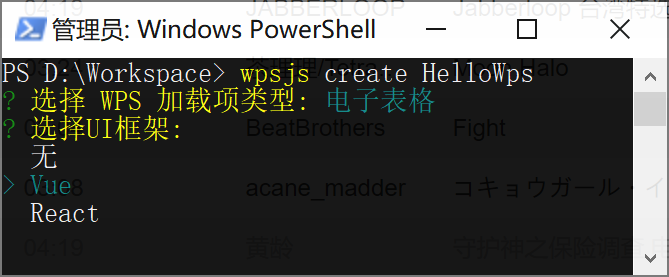
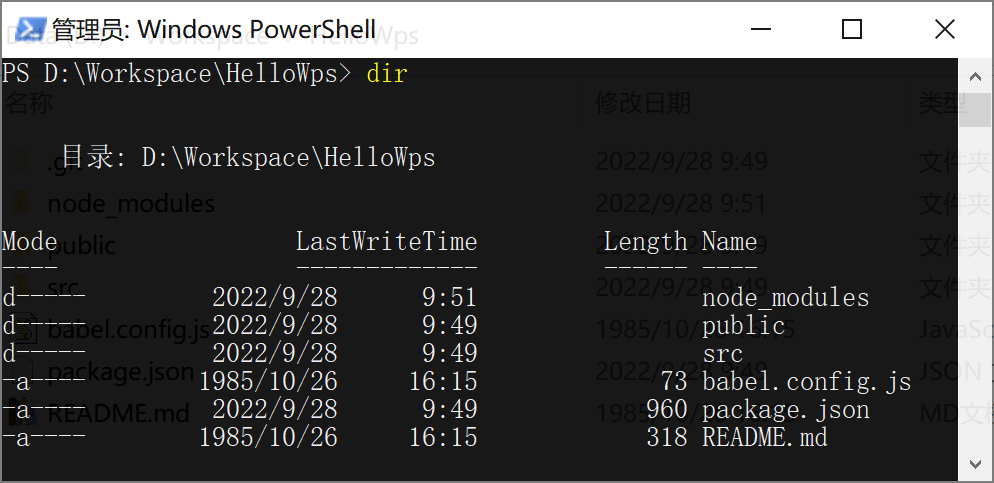
4. If you are familiar with vue, after selecting “Vue”, wpsjs will create the following project structure in the current directory
5.
Execute the debug command:
wpsjs debug
This command will automatically modify the oem.ini configuration and generate the jsplugins.xml file locally. After the command is executed, theAutomatically start wps and load the HelloWps add-on
and the wpsjs toolkit starts an http service, which mainly provides two capabilities:
- Provides a hot update service for front-end pages. When the wpsjs toolkit detects changes in web page data, it automatically refreshes the page.
- Provides the online service of WPS add-in. The code sample generated by wpsjs is an online mode. The WPS client program actually requests the online WPS add-in related code and resources through the http service.
6. Open a new tab page in wps, select New Blank Spreadsheet, if the following “wps add-in instance” appears, it means that the add-in is installed successfully.

At this point, the wps add-in code can start writing and running.But when it is officially used, we need to release the add-in to the production environment
Currently, wps provides two deployment methods: jsplugins.xml mode and publish.xml mode.
- The publish mode is packaged through the wpsjs publish command of the wpsjs toolkit, and all files in the generated folder are deployed to the server address when packaging. Inform users of the address of publish.html, and business system developers can integrate the functions of publish.html into their own pages as needed to facilitate basic environmental monitoring. This page can also be reused for users, who can control which add-ons are enabled and disabled.
- The jsplugins.xml mode is to control the loading of the add-in by setting the value of the JSPluginsServer of the oem.ini configuration file to the add-in management file jsplugins.xml (equivalent to the WPS add-in list file). During the secondary packaging, the business developer needs to inform The configuration address of our JSPluginsServer is configured in the oem.ini file, and the business developer will distribute the installation package.For the control of subsequent add-ins, business developers can freely change the jsplugins.xml file to add and modify add-ins.
publish mode:
1. Execute the release command:
wpsjs publish

2. Enter the server address where you plan to deploy the wps add-on, in this case http://localhost/wps-host/ , note that there must be a trailing slash
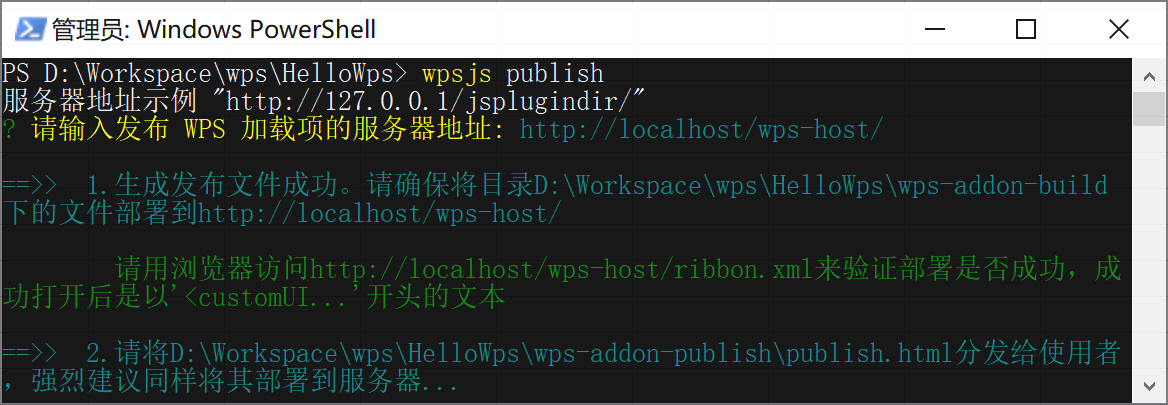
3. Follow the prompts to deploy the files in the wps-addon-build directory to the server directory.
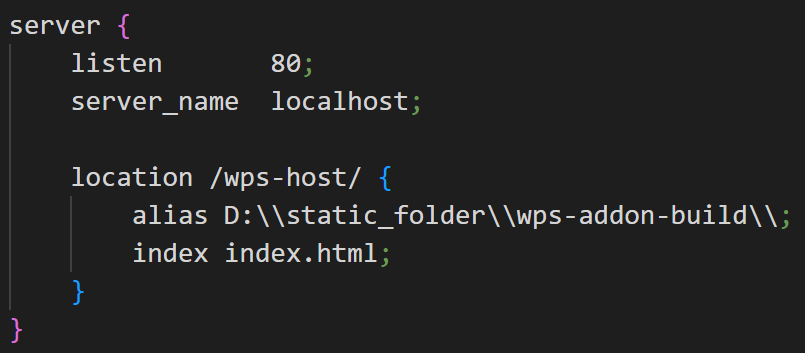
I have nginx proxy configured locally and the server directory is
D:/static_folder/wps-addon-build/
,accessible
http://localhost/wps-host/
Access the packaged files.
The key configuration of nginx is as follows
4, follow the prompts to publish.html also
Deploy to the server by accessing publish.html on the server
Implements loading and unloading of add-ins.When there are multiple add-ins, execute once under each add-in project
wpsjs publish
, and deploy each add-in individually. The address for this example is:
http://localhost/wps-host/publish.html
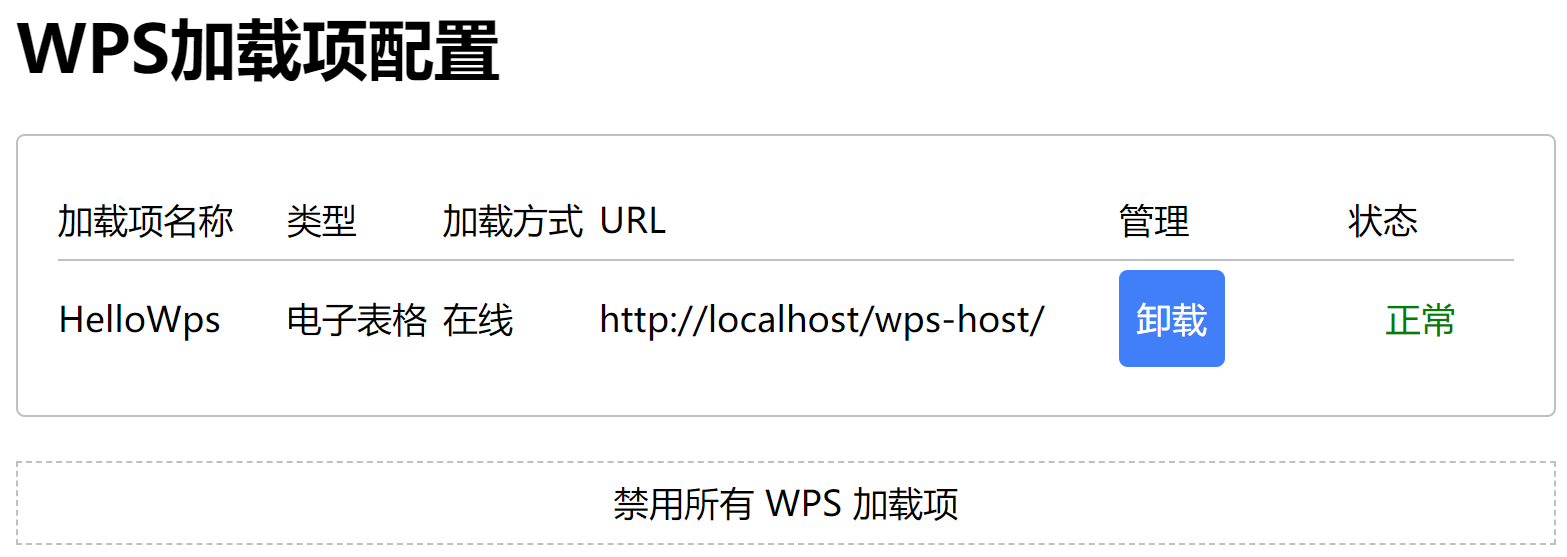
5. Open the online address of publish.html in the browser, click “Install”, wait for the page button to change to “Uninstall”, and the status shows “Normal”, it means that the add-in is installed successfully, as shown in the figure:
6. At this time, restart wps and open a blank spreadsheet. If the “wps add-in instance” during debug appears, it means that the online installation of the add-in takes effect.
7. If the above steps are all correct, but the “wps add-in instance” does not appear, you can try to
wps installation directory/office6/cfgs/oem.inidocument
JsApiPlugin=truechange to
JsApiPlugin=false
.
jsplugins.xml schema
1. Execute the production environment packaging command:
wpsjs build

2. Both offline and online methods have their own advantages and disadvantages:
Online plugins –
- Advantages: The loading is relatively smooth, the user’s first access time after the first load or version update will be higher than the offline mode, and the latest code is used every time
- Disadvantages: Every time it is executed, it is to request resources on the server, which wastes network resources, and cannot be accessed when the network is not good.
- Summary: Online mode is suitable for use when resources are frequently changed and the network is stable
Offline plugin –
- Advantages: As long as name_version is equal to the name of the add-in folder, the add-in will not update the add-in package, and the local add-in package resources are used, which greatly saves network resources and user time.
- Disadvantages: When loading for the first time or when the version is changed, the entire add-on package will be downloaded first and decompressed, which will take more time
- Summary: Offline mode is suitable for situations where resource changes are infrequent
I choose online plugins here
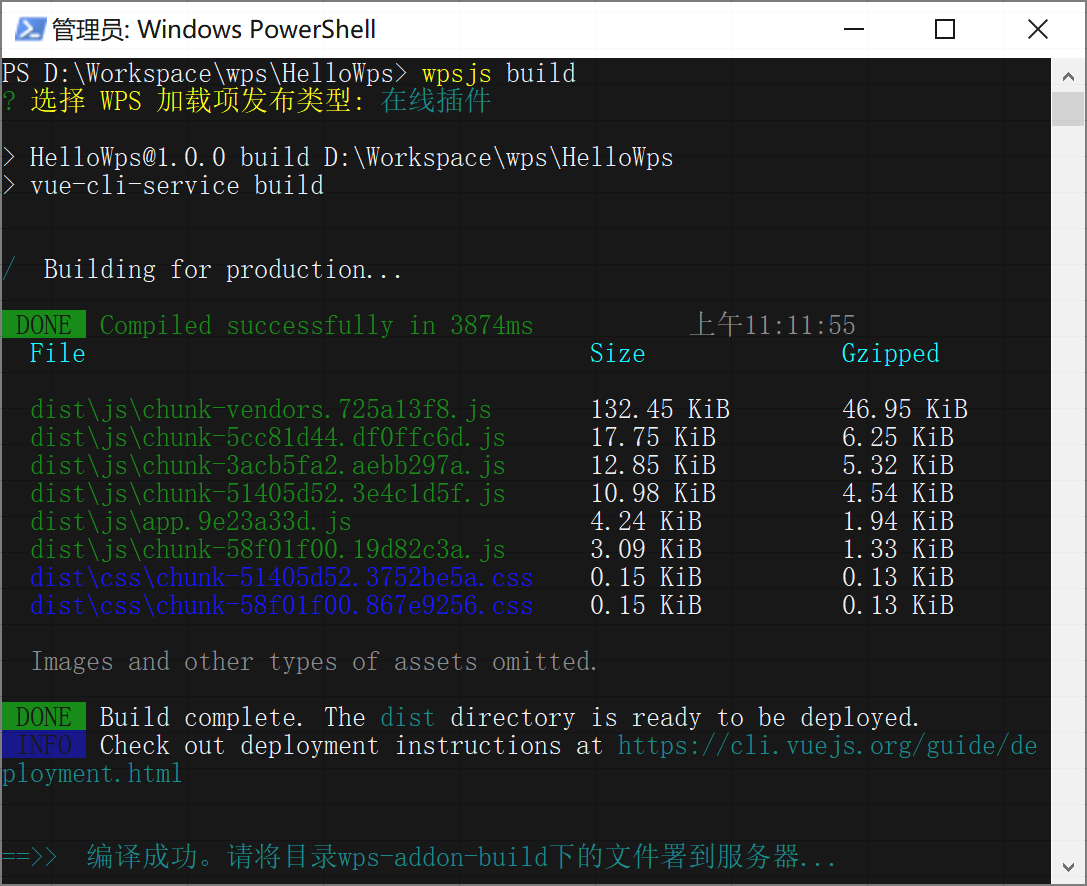
3. Follow the prompts, deploy the files in the directory wps-addon-build to the server, and then configure the address of the add-in to the original jsplugins.xml file. If not, create a new jsplugins.xml file to add the add-in address configuration to this file. Write the value of JSPluginsServer in the oem.ini file as the deployment address of the jsplugins.xml file.
#Addin #WPS #secondary #development #line #code #line #tears #News Fast Delivery